
This is 6 of 8 part of struts 2 tutorial.In this tutorial we will learn how to upload file to server in struts 2 and also how save uploaded file on directory of server machine.
Tutorial Content:
Part-1:Introduction to struts 2
Part-2:configuring struts 2 in eclipse
Part-3:Struts 2 hello world example
Part-4:Login page with validation in struts 2
Part-5:Struts 2 interceptors with example
Part-6:File upload in struts 2
Part-7:Struts 2 ajax example
Part-8:Struts 2 spring 3 integration example
Struts 2 file upload component can be used to upload mulitpart file in struts 2 application.Struts 2 utilizes in built File upload interceptor for uploading files in struts 2 application.The Struts 2 File Upload Interceptor is based on MultiPartRequestWrapper, which is automatically applied to the request if it contains the file element.
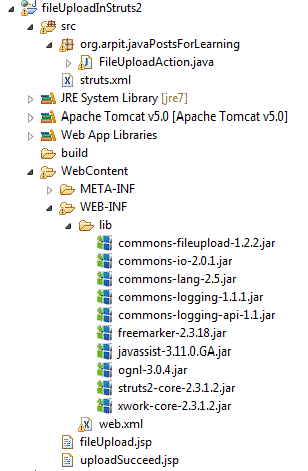
Create project named “fileUploadInStruts2”.For configuring struts 2 in your eclipse ide please refer configuring struts 2 link.Project stucture:
Action class:
package org.arpit.javaPostsForLearning;
import java.io.File;
import java.io.IOException;

import javax.servlet.http.HttpServletRequest;

import org.apache.commons.io.FileUtils;
import org.apache.struts2.interceptor.ServletRequestAware;

import com.opensymphony.xwork2.ActionSupport;

public class FileUploadAction extends ActionSupport implements ServletRequestAware {

    private File toBeUploaded;
    private String toBeUploadedFileName;
    private String toBeUploadedContentType;
    private HttpServletRequest servletRequest;
    public String execute()
    {
         String filePath = servletRequest.getSession().getServletContext().getRealPath("/");
         File fileToCreate = new File(filePath, this.toBeUploadedFileName);

         try {
            FileUtils.copyFile(this.toBeUploaded, fileToCreate);
        } catch (IOException e) {
            addActionError(e.getMessage());
        }
        return SUCCESS;
    }
    public File getToBeUploaded() {
        return toBeUploaded;
    }
    public void setToBeUploaded(File toBeUploaded) {
        this.toBeUploaded = toBeUploaded;
    }
    public String getToBeUploadedFileName() {
        return toBeUploadedFileName;
    }
    public void setToBeUploadedFileName(String toBeUploadedFileName) {
        this.toBeUploadedFileName = toBeUploadedFileName;
    }
    public String getToBeUploadedContentType() {
        return toBeUploadedContentType;
    }
    public void setToBeUploadedContentType(
            String toBeUploadedFileNameContentType) {
        this.toBeUploadedContentType = toBeUploadedFileNameContentType;
    }
    @Override
    public void setServletRequest(HttpServletRequest servletRequest) {
        this.servletRequest=servletRequest;

    }

}
Now we have declared three attributes here
private File toBeUploaded //Actual file to be uploaded
private String toBeUploadedFileName // file name of actual file to be uploaded
private String toVeUploadedContentType // content type of actual file to be uploaded
We have provided getters and setters for above attributes.So struts 2 automatically set these value according to file being uploaded.
For example if your file name is “sampleFile” then struts 2 interceptor add three parameters to request.
Three parameters are:
[sampleFile]:file
[sampleFile]FileName:String
[sampleFile]ContentType:String
you can notice here that we have given our action class attributes in same format so it will automatically set these attributes according to file being uploaded.
One more thing is that we have implemented “ServletRequestAware” interface in our action class
This is to get ServletRequest object.This request object is required to get path of server machine where file is to be uploaded.
JSPs:
fileUpload.jsp:
<%@ page language="java" contentType="text/html; charset=ISO-8859-1" pageEncoding="ISO-8859-1"%> <%@taglib uri="/struts-tags" prefix="s"%>file upload page
We have used tag for file upload interface.
uploadSucceed.jsp:
Create jsp named “uploadSucceed.jsp” under WebContent folder.
Copy following content into uploadSucceed.jsp.
<%@ page language="java" contentType="text/html; charset=ISO-8859-1" pageEncoding="ISO-8859-1"%> <%@taglib uri="/struts-tags" prefix="s"%>Upload Successful File Name :Content type: User file : Uploaded file: ">
Copy following content to struts.xml
                1048576

                    image/png,image/gif,image/jpeg,image/pjpeg


            uploadSucceed.jsp
            fileUpload.jsp
Web.xml:
It is same as in previous posts except that we have changed welcome file to “fileUpload.jsp”
Copy following content into web.xml
                1048576

                    image/png,image/gif,image/jpeg,image/pjpeg


            uploadSucceed.jsp
            fileUpload.jsp
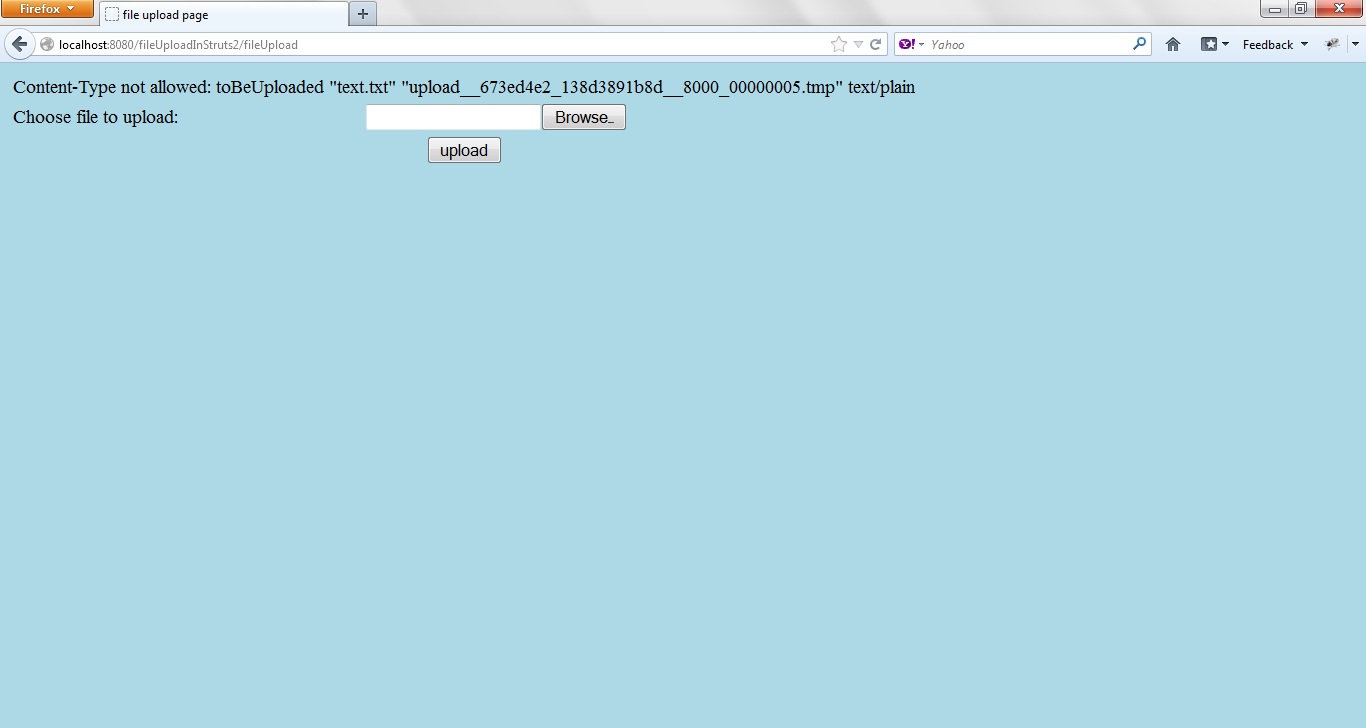
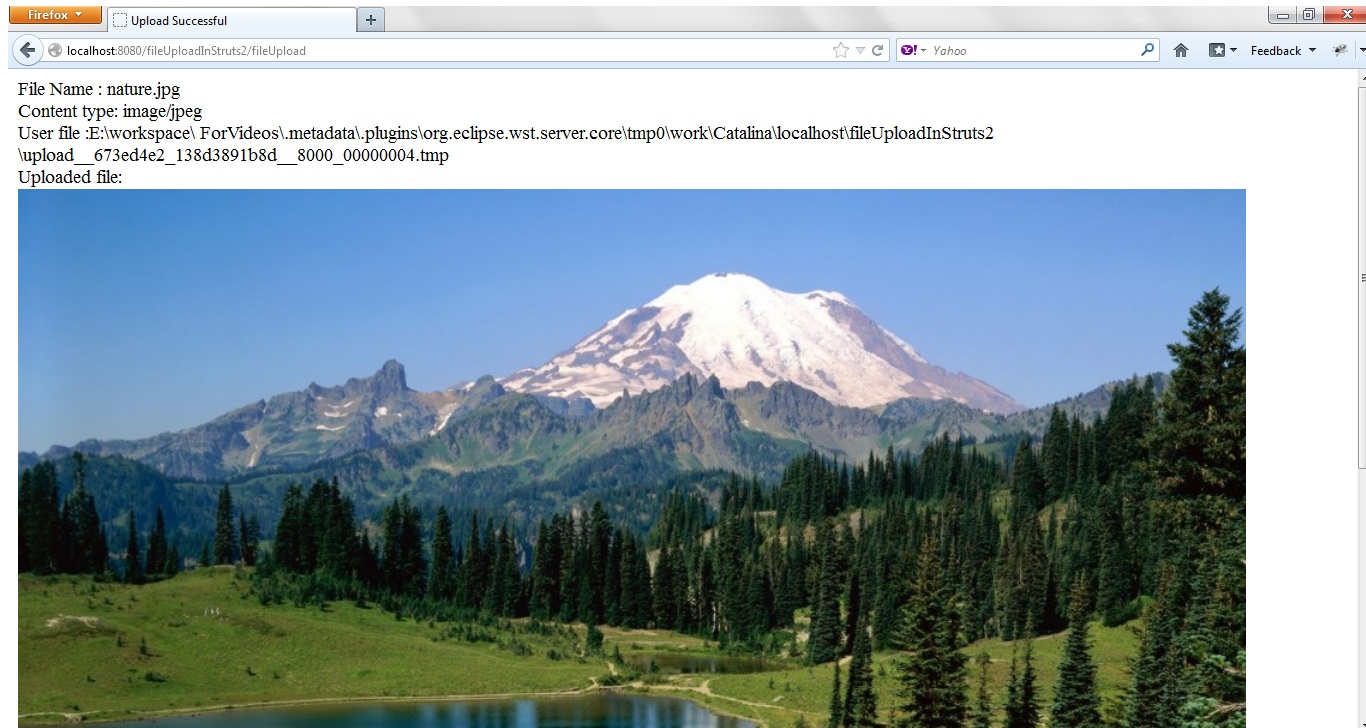
Run project:

Source code:
Source:Download without jars files
Source + lib: Download with jars files
Now in next post,we will write struts 2 ajax example.