Once you are done with Android studio download and installation, you will see below screen.
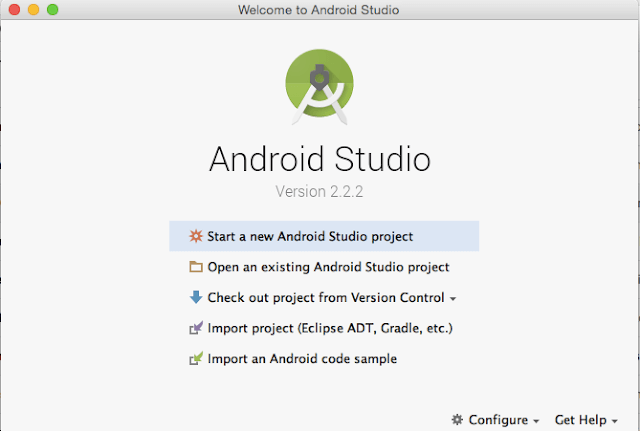
Click on “Start a new Android studio project”. You will see below screen.
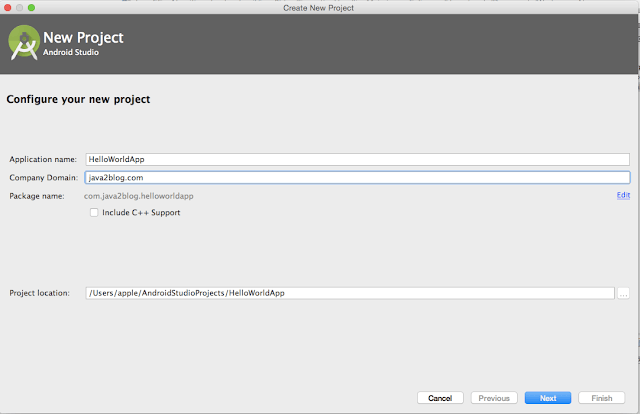
Application Name : You need to provide name of application.
Company Domain : If you have your domain, you can put it here.
Package name : Package name should be unique. When you publish your application with google play store, google play store distinguishes your app by package name only.
Click on Next after filling above form.
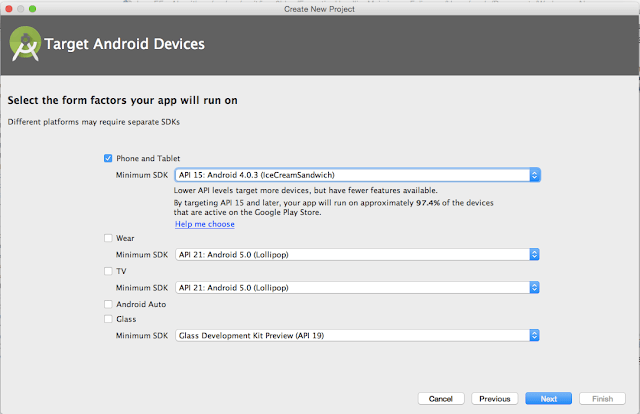
Choose “Phone and Tablet” and select Minimum SDK, you want to support for your application.
Click on Next and you will see below screen:
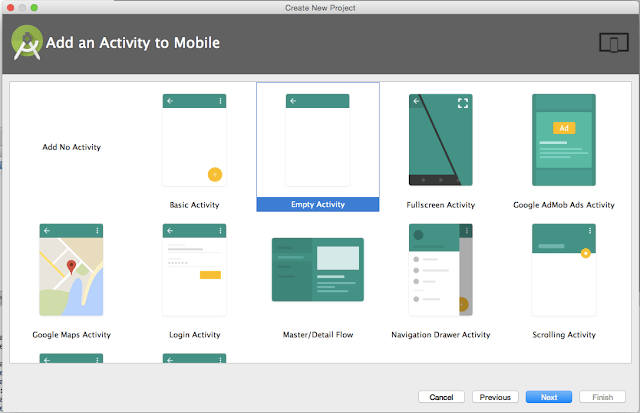
It is activity selection screen. We will choose “Empty Activity”. It should be good enough for our hello world project.
Click on Next.
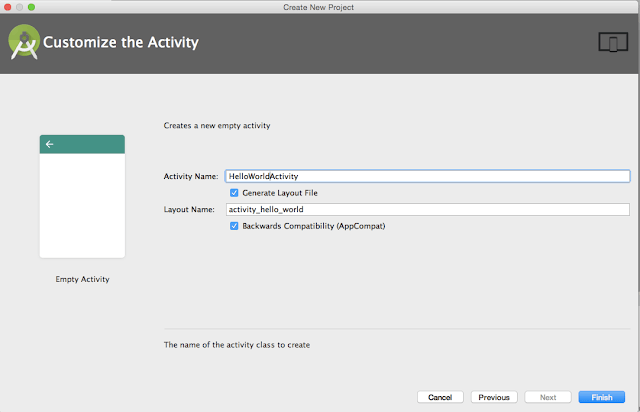
Activity Name : It is name of Activity , you want to create. I have put it as “HelloWorldActivity”.
Layout Name : When Android studio create activity for you, it also create layout xml file which binds with the activity.
Don’t worry , if you do not understand about it much, I will write separate post to explain Activity.
Click on Finish. You will get below screen.

Run Hello World App :
Lets run the app now.
Go to Run – > Run ‘app’ , you will see below screen.

We are going to create Android Virtual Device to demonstrate create android app.
Click on “Create New Virtual Device” , you will see below screen.
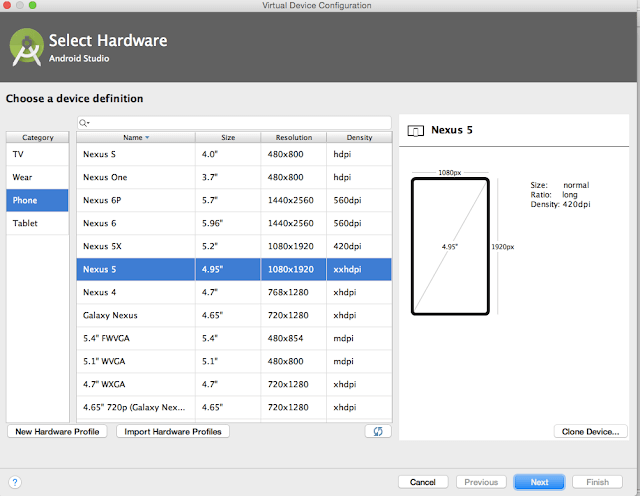
Choose suitable android configuration on which you are going to test your application. Click on next.
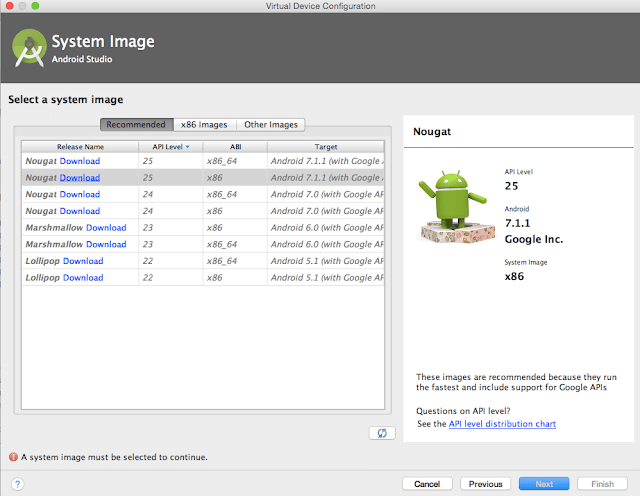
Here we are going to select System image, you may not have downloaded system image, so you can download by clicking on link.
When you click on download, you will see below screen.
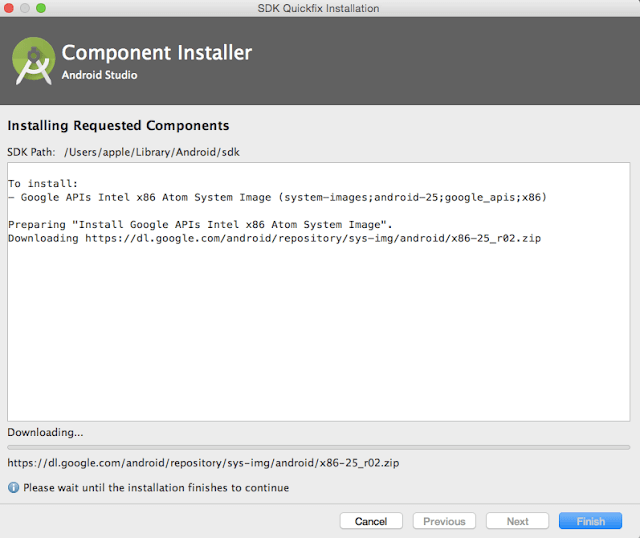
It will download system image, once done click on Finish. You will see below screen.
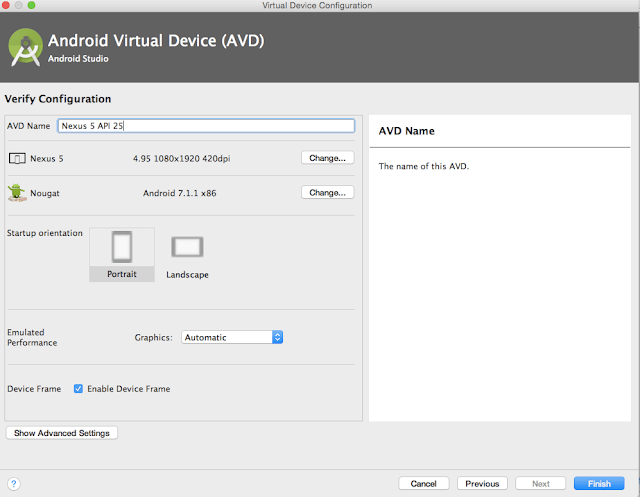
You can provide name to your AVD. Click on Finish.
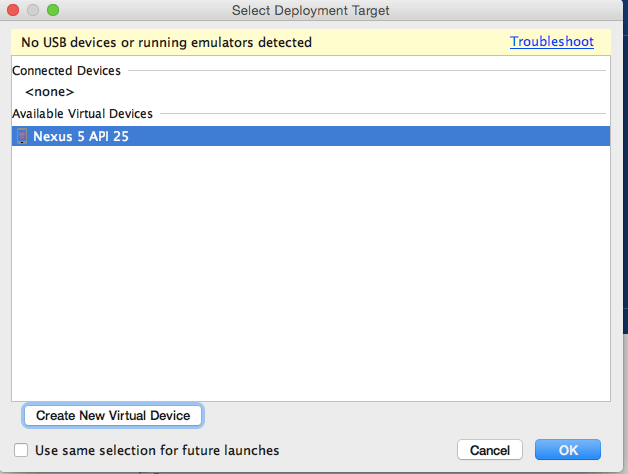
Choose downloaded AVD and click on Ok.
You will see an additional app started.
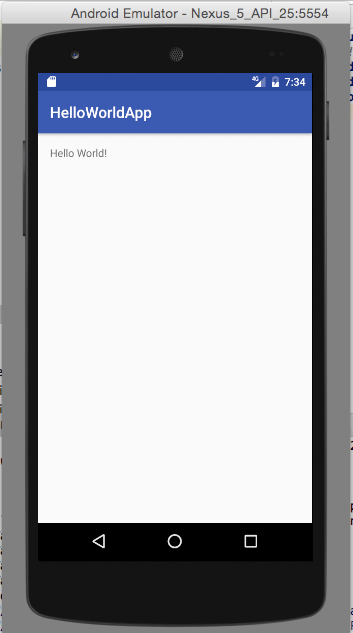
Bingo!! we have successfully create Hello world Android App. Don’t worry if you do not understand much yet, I will explain about Activity and Android folder structure which will help you to understand created android app.


It is good i want more mobile applications from u